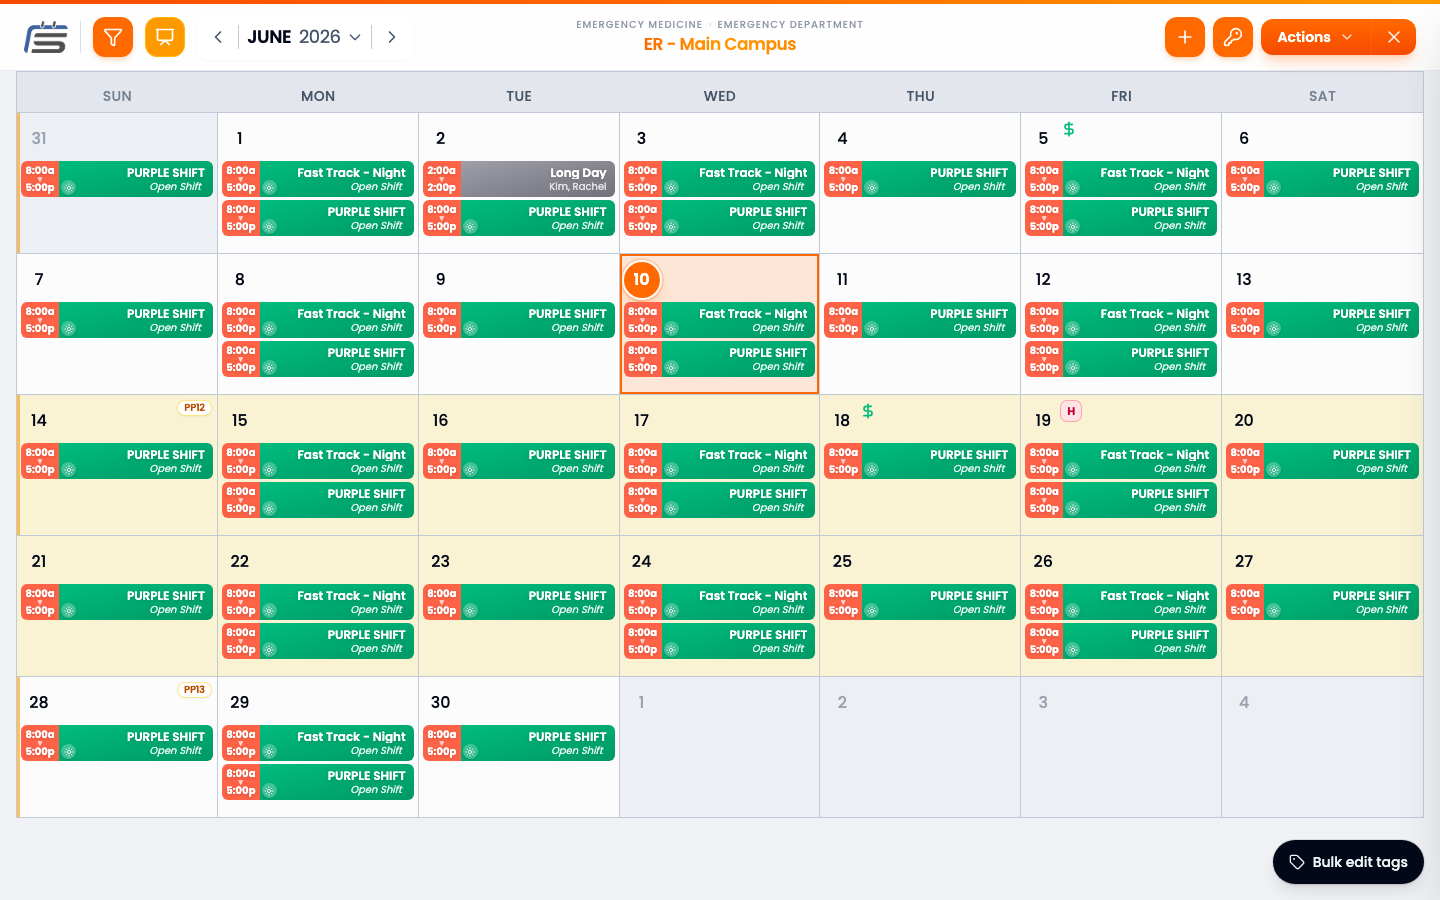
The Admin Calendar

The Admin Calendar

The admin calendar shows every shift on your team in one place — and lets you filter it, edit in bulk, and see time-off alongside the schedule.

The full picture

The calendar is your team’s whole schedule, month by month. Every shift, who’s on it, where, and when — all in one view. It’s where you go to see how things are shaping up and to make quick fixes.

The admin calendar showing a full month of color-coded shifts.
The admin calendar: a month of shifts, color-coded by location, with filters across the top.

Three ways to view it

The same month can be laid out three ways. Open the calendar’s Actions menu and look under Display to switch — the calendar remembers your choice.

1

Classic — stacked rows per day

The everyday view: each day lists its shifts top to bottom. Best for general reading and editing.
2

Timeline — grouped by time of day

Shifts line up by when they happen, so overlaps and gaps in the day jump out. Best for spotting coverage holes hour by hour.
3

Buckets — grouped by location

Each day groups its shifts by location. Best when you think in places — “who’s on at the Front Desk this week?”
Switching the same month between Classic, Timeline, and Buckets from the Actions menu.

Filtering the view

1

Narrow it down

Filter by a person, a location, or a tag to focus on just one slice of the schedule. The clutter drops away and what’s left is easy to read.
2

See the whole team

Clear the filters any time to zoom back out to everyone.
Filter before you fix
When you’re hunting for a problem — a double-booking, a gap — filter to the person or location first. It’s much faster than scanning the whole month.

Highlight rules

Where a filter hides everything else, a highlight keeps the whole month visible and just makes what you’re checking glow. Each rule paints matching shifts a color of your choice.

1

Add a rule

In Filters, open the Highlights tab and add a rule — pick a person or a shift name, and a color.
2

Read the month at a glance

Every matching shift lights up in that color. Stack a few rules in different colors to compare — say, two people’s shifts side by side across the month.
It’s a lens, not an edit
Highlights only change how the calendar looks to you — the shifts themselves aren’t touched, and nobody else sees your colors. Clear the rules whenever you’re done checking.

Editing in bulk

1

Tag many shifts at once

Tap Bulk edit tags (the floating button on the calendar), then build your selection — click shifts one at a time, or click a day to grab every shift on it at once. Add, remove, or replace their tags together. One action instead of dozens.
Bulk actions hit every selected shift
Double-check what you’ve selected before you apply — the tag change lands on all of them at once.
Tag whenever you like — even live
You can tag a shift anytime, even after it’s published, right here on the live calendar. Tagging before you publish just keeps the schedule tidy the moment your team sees it.
Bulk edit tags: select the shifts (or grab them all), then add, remove, or replace tags in one go.

Admin Calendar FAQ

Is this the same calendar my team sees?

It’s the same shifts, but the admin view gives you extra powers — filtering everyone at once, editing several shifts together, and seeing time-off in context.

Can I edit more than one shift at a time?

Yes — for tags. Turn on bulk edit, select several shifts, and add, remove, or replace their tags in one action. Reassigning or removing shifts is done one at a time from the shift itself.

Why would I filter the calendar?

A busy schedule is a lot to take in. Filter by a person, a location, or a tag to focus on just the part you care about right now.